Logjam: Difference between revisions
Jump to navigation
Jump to search
Updated map version + dwnload. Added comp history (as far as I know of). Added links to one day cups announcement posts. |
→Map Locations: Added images and named places I know of. A few places still need (proper) names |
||
| Line 20: | Line 20: | ||
==Map Locations== | ==Map Locations== | ||
{{Map locations | |||
| title = Logjam — The middle point | |||
| image = Logjam mid.jpeg | |||
| area1 = Under | |||
| x1 = 318px | |||
| y1 = 274px | |||
| area2 = Lower Log-Room | |||
| x2 = 182px | |||
| y2 = 225px | |||
| area3 = Top Log-Room | |||
| x3 = 223px | |||
| y3 = 156px | |||
| area4 = Shack / Hut | |||
| x4 = 373px | |||
| y4 = 138px | |||
| area5 = Choke | |||
| x5 = 423px | |||
| y5 = 141px | |||
}} | |||
=== Second Point === | |||
{{Map locations | |||
| title = Logjam — The second point | |||
| image = Logjam second 1.jpeg | |||
| area1 = Cave | |||
| x1 = 612px | |||
| y1 = 199px | |||
| area2 = Doughnut | |||
| x2 = 425px | |||
| y2 = 143px | |||
| area3 = Underpants | |||
| x3 = 395px | |||
| y3 = 262px | |||
| area4 = Main | |||
| x4 = 279px | |||
| y4 = 178px | |||
| area5 = Flank | |||
| x5 = 83px | |||
| y5 = 304px | |||
}} | |||
===Last=== | |||
{{Map locations | |||
| title = Logjam - Lobby | |||
| image = Logjam_last_1.jpeg | |||
| area1 = Main | |||
| x1 = 434px | |||
| y1 = 179px | |||
| area2 = Sneaky | |||
| x2 = 100px | |||
| y2 = 208px | |||
| area3 = Flank / I.T. / 19 | |||
| x3 = 665px | |||
| y3 = 128px | |||
| area4 = Wall | |||
| x4 = 528px | |||
| y4 = 215px | |||
}} | |||
{{Map locations | |||
| title = Logjam — The last point | |||
| image = Logjam_last_2.jpeg | |||
| area1 = Shutter | |||
| x1 = 65px | |||
| y1 = 220px | |||
| area2 = Top Right / Top Sneaky | |||
| x2 = 425px | |||
| y2 = 134px | |||
| area3 = Lower / Lower Right / Lower Sneaky | |||
| x3 = 488px | |||
| y3 = 185px | |||
| area4 = Main | |||
| x4 = 259px | |||
| y4 = 193px | |||
| area5 = Block | |||
| x5 = 376px | |||
| y5 = 195px | |||
}} | |||
==Links== | ==Links== | ||
Revision as of 22:25, 21 January 2015
Template:Map infobox cp_logjam is a 5cp custom map created by Hyce. Currently in the version cp_logjam_b17.
History
Usage in competitive
Logjam is used mainly in 6v6. It is currently in the ETF2L Season 20 map pool and was used in the ETF2L Season 19 and CEVO-P Season 6 map pools. The map was also featured in ozfortress' Second Summer Cup and ETF2L's Logjam Cup.
Map Locations
| Logjam — The middle point |
|---|
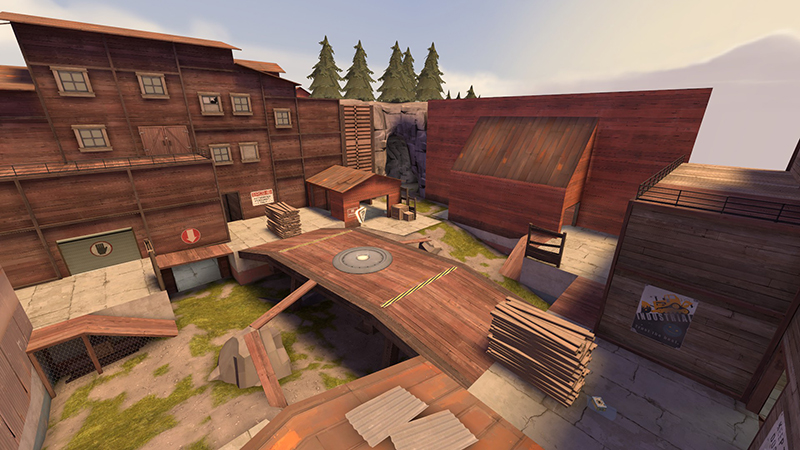
Under Lower Log-Room Top Log-Room Shack / Hut Choke |
Second Point
| Logjam — The second point |
|---|
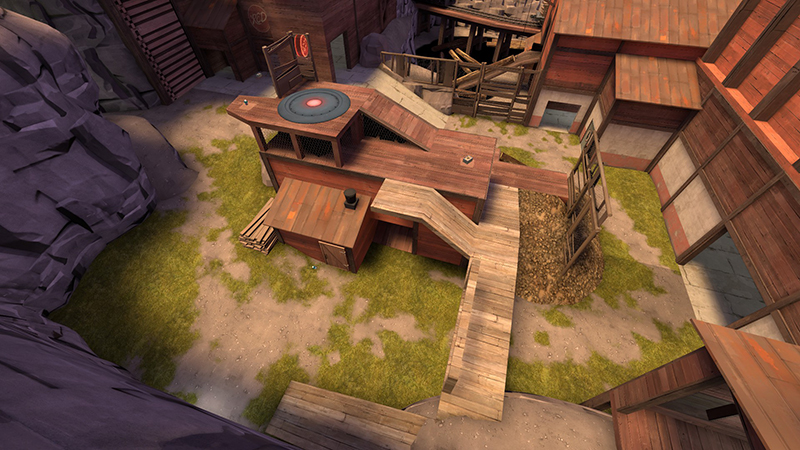
Cave Doughnut Underpants Main Flank |
Last
| Logjam - Lobby |
|---|
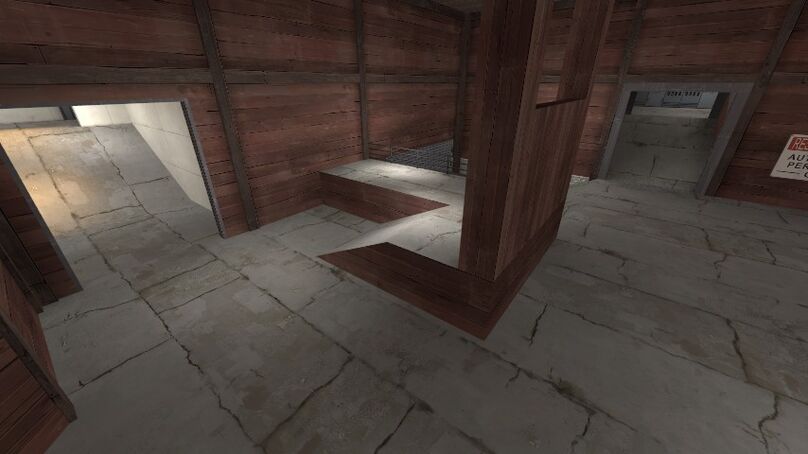
Main Sneaky Flank / I.T. / 19 Wall |
| Logjam — The last point |
|---|

Shutter Top Right / Top Sneaky Lower / Lower Right / Lower Sneaky Main Block |
Links